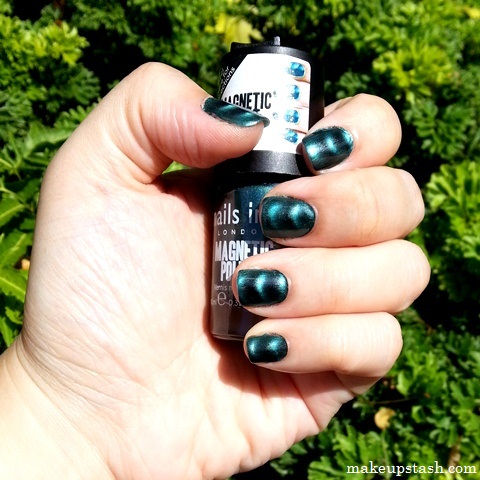
I know some beauty bloggers feel that nail posts are the easiest to do (*waves* Paris B and Iris!) but I find application a chore, especially when I have a cruising nursling who lunges for everything she’s not supposed to – nail lacquer bottles, nail polish remover, soaked cotton pads and tips…you name it and she will find it!
So it was with much delight that I discovered how easy-peasy Nails Inc. Magnetic Polish is to apply, minimising the amount of time I spend on my nails (and the stress involved in keeping baby from my mani thingies).
Granted, I made the stupid mistake of not reading the instructions first: Let me tell you now that you must apply magnetic polish over a regular varnish. If you don’t, you will despair like I did, when you are greeted with no pretty pattern after putting nail to magnet.
That little hiccup aside, everything went swimmingly once I remembered to check the instructions.
Here’s what you should do:
- Apply a base coat on all your nails and let it dry.
- Apply a coat of regular nail varnish and let it dry for a bit. (It doesn’t have to be opaque; I used OPI Lucerne-tainly Look Marvelous, a sheer one-coater, in the pic above.)
- Apply the magnetic polish over one nail.
- Position the nail on the magnet cap, resting it on the raised lip.
- Move on to the next nail.
- Apply a topcoat when all your nails have met the magnet. (I used Ettusais Gel Top Coat.)
It’s a cinch, really. I especially love how quickly the pattern appears and how fast the polish dries. You’ll have to do one nail at a time but it will be a breeze given how quick the process is – the magnetic particles rise to the surface almost immediately! For a distinct print, I’ve found that it helps to place the nail over the magnet as soon as the magnetic layer is applied.
I’m a nail-dunce, to say the least; so I like how this polish makes me feel less inept than usual, where application is concerned. ;)
»»»«««
This unique formula has been specially developed with metallic particles to create a pattern on the nail using magnetic forces. As the magnet is held over the nail, the iron powder in the formulation gravitates toward the magnet forming the pattern/design secretly hidden in the magnet for an astonishing finish!
– Nails Inc.
I was asked why the wavy pattern…I thought about it for a bit and concluded that it’s because magnetic force comes in waves. What do you reckon?
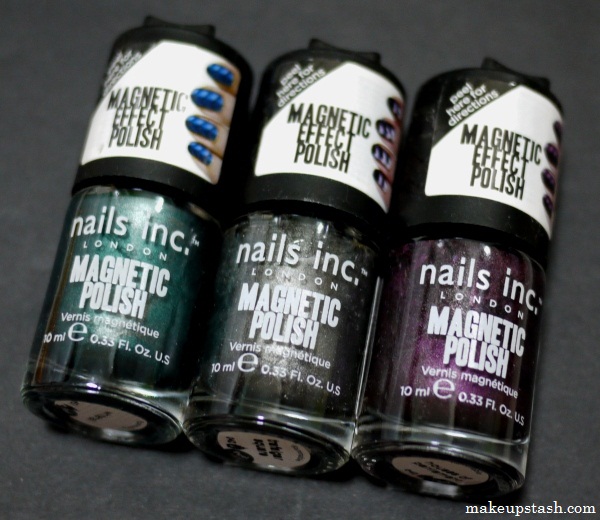
In Singapore, these polishes can be found at Watsons, where they retail at S$21.90. I purchased Whitehall at the Ion Orchard store and coincidentally received it from Watsons Singapore as well, together with Trafalgar Square and Houses of Parliament.
Whitehall, Trafalgar Square, Houses of Parliament
Here’s how the three look on the nails, when done right. Are you attracted to these lode-ly lacquers yet? ;)
Image and video sources: Nails Inc. and Sephora


I really want to try these – saw them in Glamour magazine. Must look for an Aussie stockist.
Sam,
If you don’t get there there after all, let me know if I can help. :)
haha I’m absolutely horrendous at doing nails myself so technically I don’t agree with myself that they are easy posts to do, but they sure do make good filler posts! :D I actually quite like the look of these magnetic polish. They’re great for non nail arty types like me (although I don’t think we get them here or maybe I just don’t know if we do :\)
Hey PB,
Nail bloggers seem to do them effortlessly! Not only do I have neat nail envy, I also have sunshine envy, when it comes to many nail bloggers! ;) These magnetic polishes are really easy to work with! (Email coming your way. ;))